
Computer design of the Lucio Gun


Actual printed Lucio Gun
Printing the gun
For this project I have used my Ultimaker 2+ in combination of Formfutura EasyFil™ PLA, which are are high-end “easy to use” 3D printer filaments. EasyFil™ PLA is slightly modified with an impact modifier making the filament tougher, slightly softer, less rigid, much longer preservable and easy to print at relatively low temperatures. The printer settings I have been using for this project are: heated bed temperature of 60° and the nozzle temperature of 220°. All parts have been sliced in Simplify3D using an avarage of 7% Infill and printig with 0.25mm layer height. At the end of this blog you'll screenshots of the Simplify3D settings I have been using.


The hardest part
The real challenge in this project was finding the right setting of infill and speed to be able to reduce the time of printing but at the same time have a good quality print and strong parts. I have been able to solve this problem looking always at the preview of the gcode and checking everything will come out well and try to adjust all the time the infill for each parts.
Assembling and painting the gun

After I have printed all the parts, I have started to sand them down with 80 grit sandpaper. Be sure to clean well all the parts after this process to remove all the dust!

Next step is to glue all parts together, for this process I'll use Epoxy glue and superglue.

Z-poxy is a finishing resin; you will find 2 bottles in the box one is resin and the other is hardener. You have to mix both products in equal amounts and apply it on the model. The working time is around 20-30 minutes and the cures take around 3 hours.
After the Z-poxy cure you are ready to sand the object again and apply a coat of filling primer. At this point you can understand that your model will have some imperfections and you'll need to fix it with 320 grit sand paper and filling primer. You can repeat this process until you are happy with the final result of the surface.

Painting
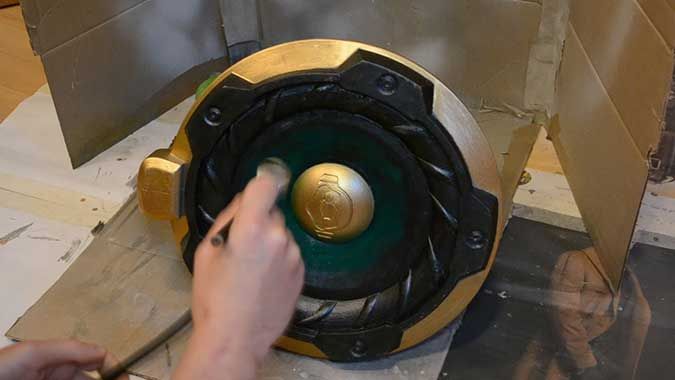
After everything was well dried I'll remove the tape carefully and start to paint all the other parts with a brush and an airbrush with acrylic paint. When I'm satisfied with the paint job, I have to seal and gloss the gun using some varnish.

Electronic parts
Now it is time to work on the electronics parts, I have used a guide on Adafruit were they did a circuit for the use of a speaker and be able to plug your smartphone to play music.
It was really easy put all the circuits together and I have decided to be able to disconnect the speaker from the board so I can have access inside the gun and would be more easy to move the gun without damage them.
I apply velcro inside the gun to be able to stick and remove the battery pack and I did the same for the speakers.


Screenshots of the Simplify3D settings (click to enlarge):


Video:
Thanks for reading
About the author
Simone Fontana is an Italian 3D designer and currently co-founder of 3DNA Ltd working in the 3D printing industry with a background in web development. Simone is driven by creativity and he knows how to design for 3D printing and have as well a strong knowledge of FDM technology and different machines.